My Raspberry Pi 3B recently died… again. The file system on the microSD card became corrupted, which is a common occurrence when the Pi abruptly loses power.
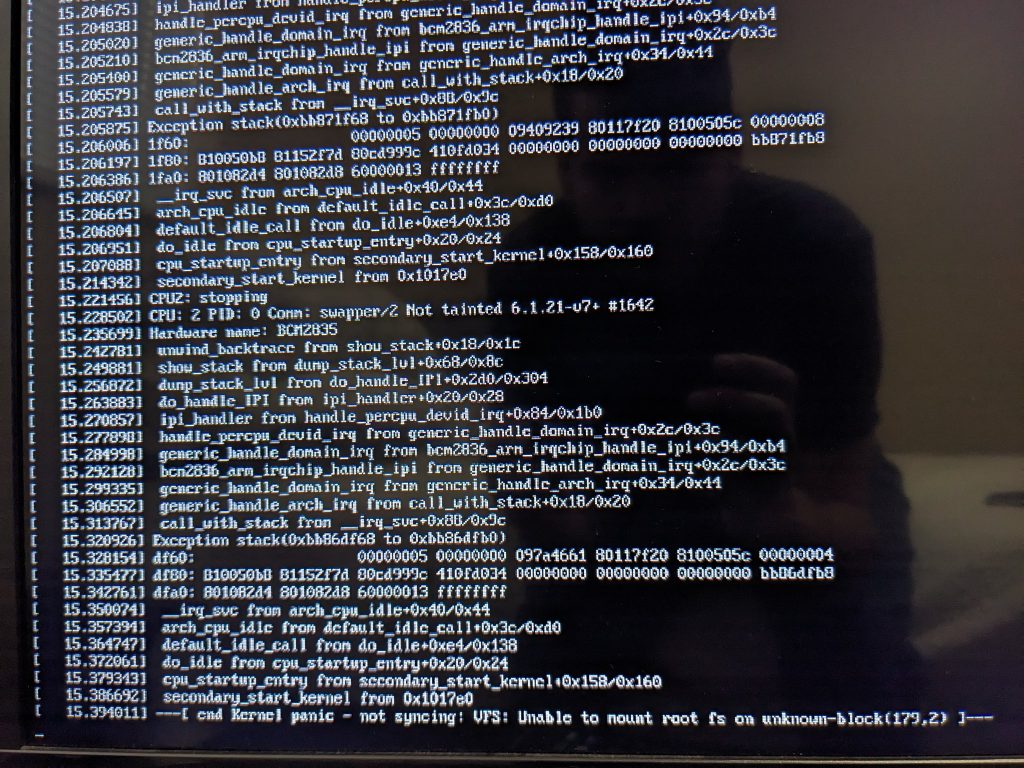
I had been using the low level “dd” GNU/Linux utility to back up the entire file system daily to a USB drive, leveraging the crontab. I was hoping that this would allow me to easily reimage the microSD card and get back online quickly after an issue like this. Unfortunately… that strategy did not work out well for me in this case, as I was unable to restore the system using the file system backups that I had.
This incident taught me (again!) that backups are not to be trusted and that you must actually test restoring your backups if you want to have confidence in your backup system and processes.
I’ve started over from scratch with my Raspberry Pi 3B multiple times in the past, and the install and setup process has taken way too long for my liking. As such, I went searching for a new way to do things this time.
Enter DietPi OS
What is DietPi?
DietPi is an extremely lightweight Debian-based OS. It is highly optimised for minimal CPU and RAM resource usage, ensuring your SBC always runs at its maximum potential.
The DietPi project
DietPi is an open source, free software (GPLv2 license) operating system, built by volunteers and free to use by anyone.
Downloading the OS image was actually a slight bit confusing for me at the start. You need to go to their downloads section, but then there is a large button that says “View DietPi-Benchmark scores for all devices”. It’s nice that they have this information, but as the first call to action in the “Download” section, it confuses folks and sends them to the wrong area when they’re trying to just download an image.
Below this, you’ll see a matrix of different hardware devices with images. You need to click on your device type (I chose “Raspberry Pi 2/3/4”), then click the Download icon or text to begin the download.
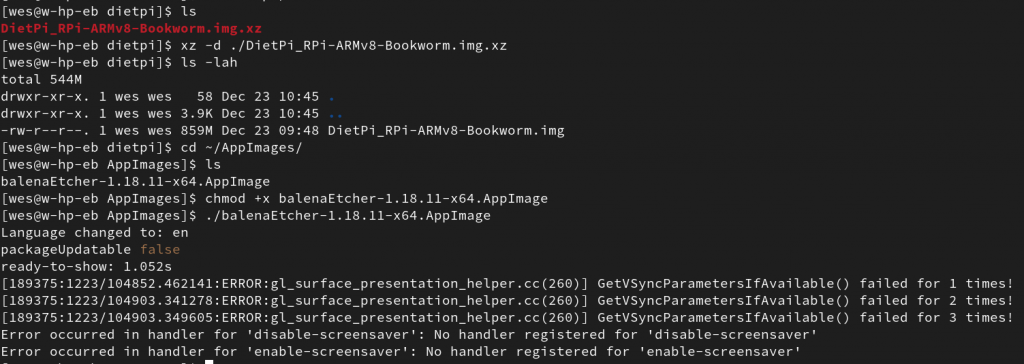
The file I downloaded (DietPi_RPi-ARMv8-Bookworm.img.xz) was a mere 139M! Now that’s an OS image on a diet!
Uncompressing with the xz util and flashing with BalenaEtcher
With the image file being a compressed “xz” file type, we need to use the xz utility to uncompress it.
Running “xz -d ./imagefilename.xz” does the trick here, as shown in the screenshot below. The 139M image was exploded ( a humorous way to say uncompressed ) into an 859M image (.img) file.
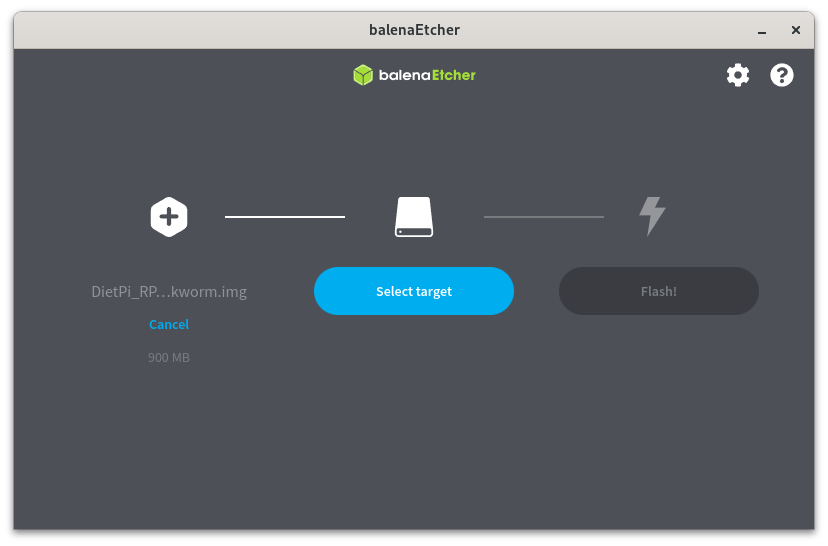
Once you have the image file, you can flash the image to a microSD card! For this, DietPi recommends the “BalenaEtcher” utility, which I hadn’t used before. You can download this as an AppImage file, make it executable, and then run it on a Linux OS with a graphical interface.
BalenaEtcher has a clean, simple to use interface, and it selected the correct USB drive/microSD card by default when I flashed the image. I love utilities like this that do things right and make things easy.
After a quick image flashing process, I took the microSD card over to my Raspberry Pi 3B and installed it. I then powered on the system and ran through the DietPi initial set up process. This was easy and smooth, with one hiccup being that the keyboard layout assumes “UK” and you have to jump around a little to find and select the “US English” keyboard layout.
Notably, the initial setup process takes you through the process of resetting the default password for the root and dietpi users on the device. I was glad to see that this is built into the initialization process.
Once that was completed, I was taken to the root shell and my Raspberry Pi was back up and running! This was a tremendously quicker experience than I’ve had in the past when installing and setting up Raspberry Pi OS (formerly Raspbian) and DietPi does really feel quicker/faster/lighter/smoother.
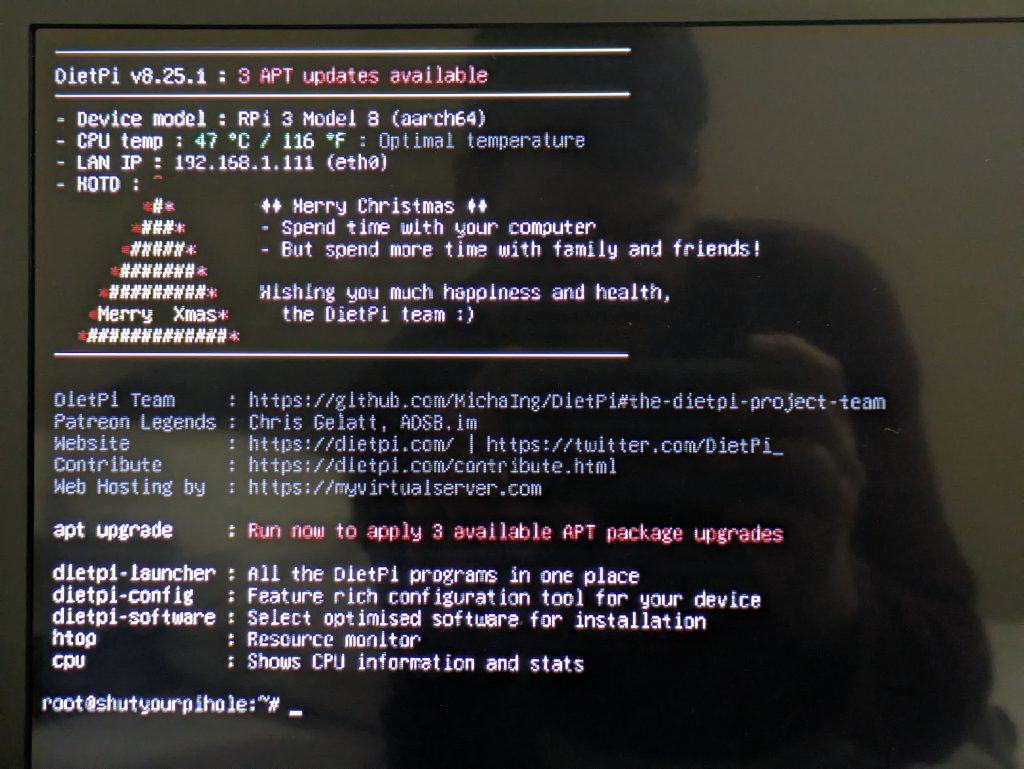
I installed a few more utilities, updated the host name and installed pi-hole as well. I was also greeted by this cute Merry Christmas message (shown below) when checking on the system on Christmas day.
So far, I’m really enjoying DietPi and would absolutely recommend it to others who are looking for a faster, more lightweight OS for a Raspberry Pi or another single board computer (SBC). Well done DietPi team!